Flower Arranging 101
- Amanda Henderson

- May 18, 2021
- 2 min read
Even though I'm no expert, I thought I'd share with you my process of basic flower arranging. This is the simple process I generally use. Anyone can do it with just a jar and flowers from your yard or grocery store.

The Vessel and Water

I prefer a vessel with a wide and low profile. To me, they look the best for asymmetrical style arrangements, which I love. Think wide mouth jars and vases or gravy boats for this type arrangement. Also, always make sure that whatever vessel you use, it is clean enough to drink out of. Dirty vessels introduce bad bacteria into the water, and therefore, the flower stems and will make you arrangement's vase life much shorter. Something to note: a lot of people will use a flower frog, flower tape, flower foam, or even chicken wire to secure stems in these type arrangements. I didn't use any of those for this particular one. I wanted to demonstrate that you can still make a beautiful arrangement using only what you might have on hand at home.
Also, using flower preservative, or flower food, will preserve your flowers and help them last longer. I like Chrysal and use it for all of my arrangements.
Step 1: Foliage

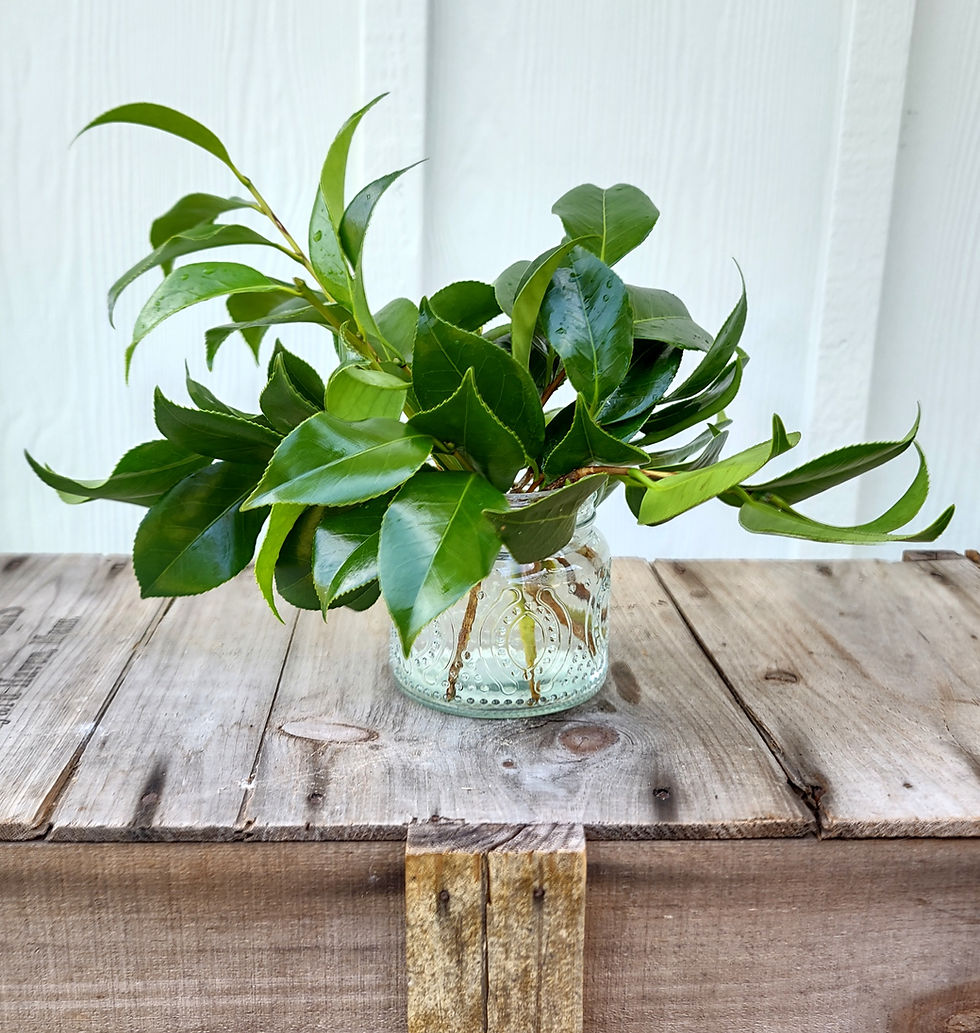
Now is the time to get the basic shape of your arrangement. I love the asymmetrical look, so I try to let one side be higher and the opposite side swoop down a bit. The first layer of foliage is generally a heavier base, like these camellia branches. It gives good structure and base for your flowers.
Step 2: Texture Foliage

Next, I like to add more greenery, but in different textures. Whereas the camellia branches are visually weighty, the boxwood and rosemary add a little more airiness. Again, I let one side stay taller while the other side swoops lower. ***Be sure to remove all leaves and foliage that will go below the water line.
Step 3: Focal Flowers

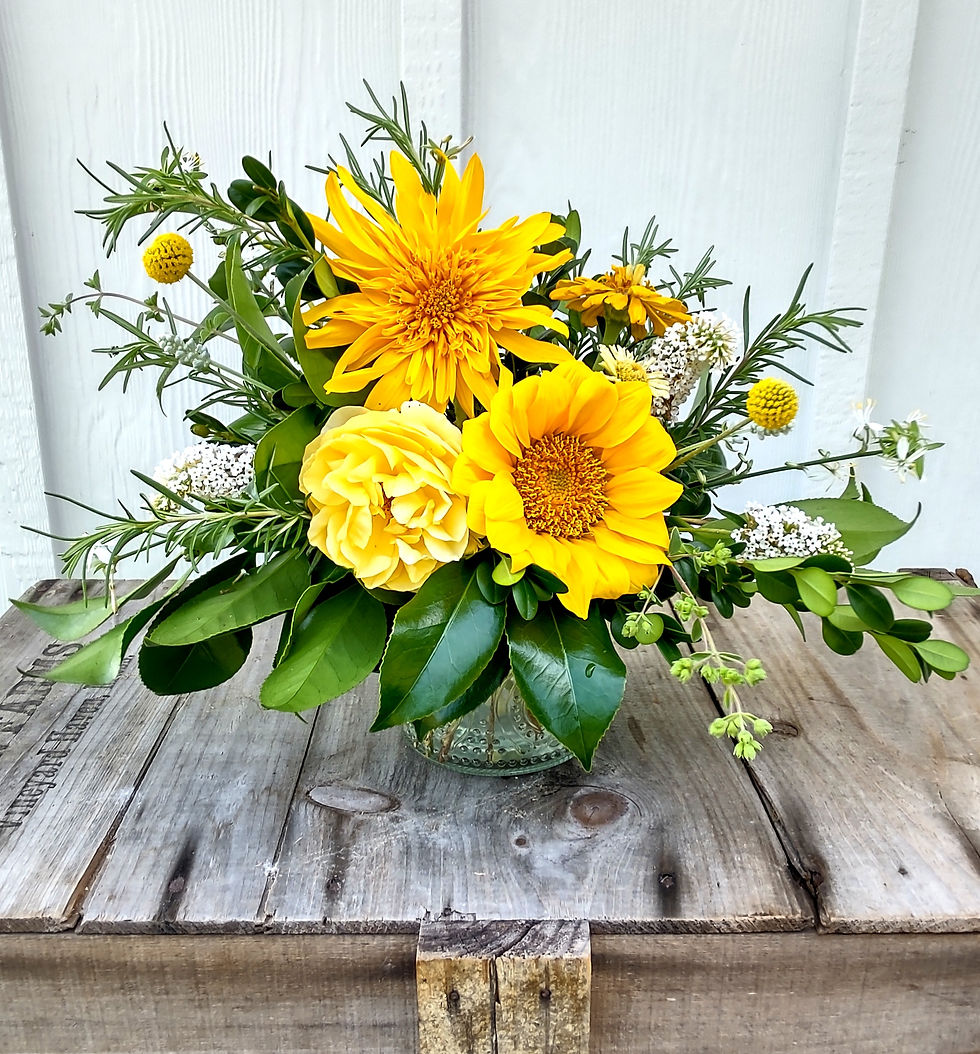
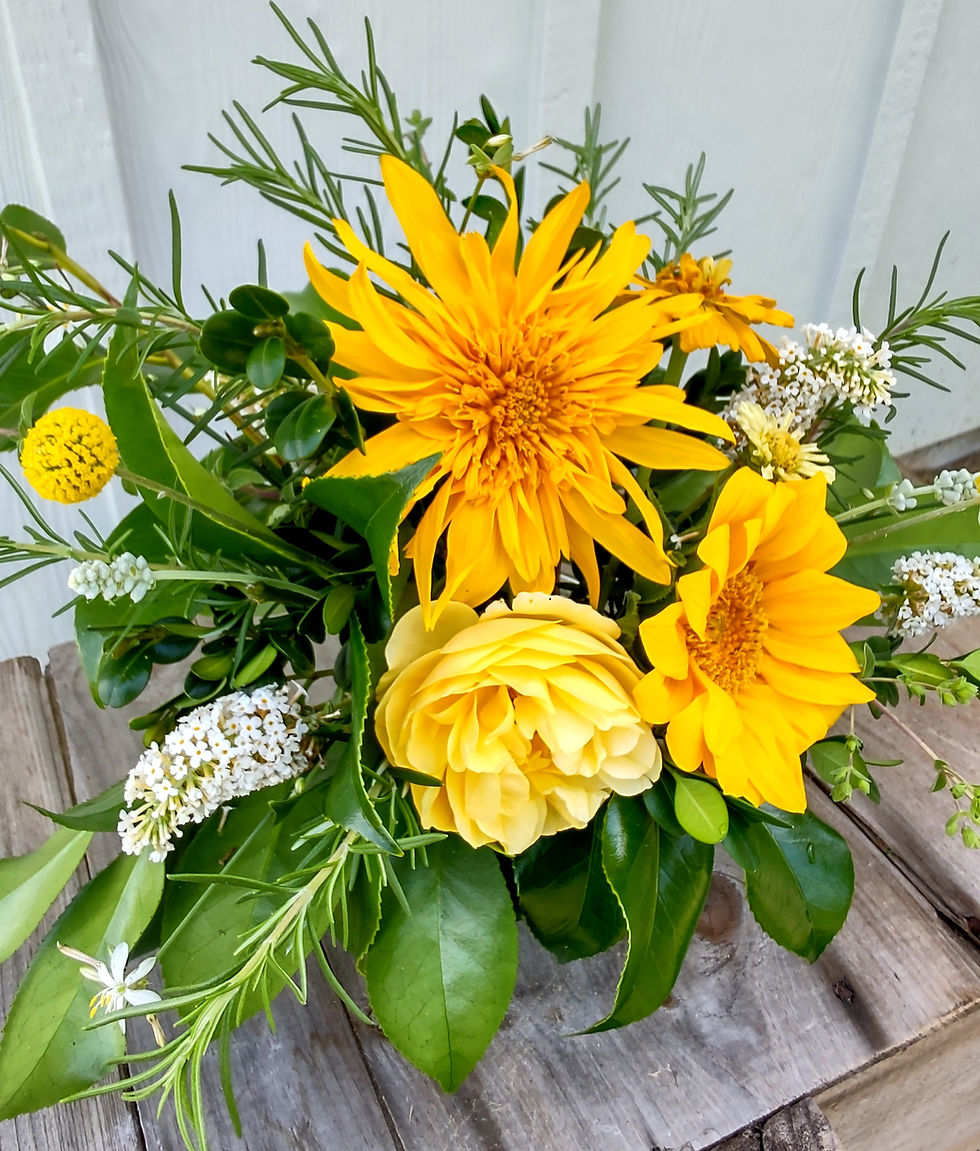
Next, I add my focal flowers. For this arrangement, I'm using two sunflowers; the top one is Procut Double Quick and the other is Procut White Lite sunflower. The rose is a David Austin rose called The Poet's Wife.
Step 4: Filler Flowers

Filler flowers can add some amazing pop to your arrangement. I like to use the filler to reiterate the shape and structure of the arrangement, like how the Billy Buttons rest up high on the left and lower and shorter on the right. I also added in some white flowers--white salvia and buddleia (butterfly bush) blooms.
Step 5: Final Adjustments

At this stage, I'm basically looking for any areas that look too weighty, or might need softer or whispy pieces. I also try to fill in any visual holes. I added some delicate herbs and spider plant blooms to achieve that here.


So, there you have it; the basic steps I use to build an arrangement. I do the same thing with mason jar arrangements, too, but I let them be a little more symmetrical. Really, it just takes some practice and don't be afraid to experiment!
Hope you'll give it a try soon!
Amanda
*this post contains affiliate links


Comments